

How To Personalize Water Bottles Without Cricut
*This mail service is sponsored by Craftey.
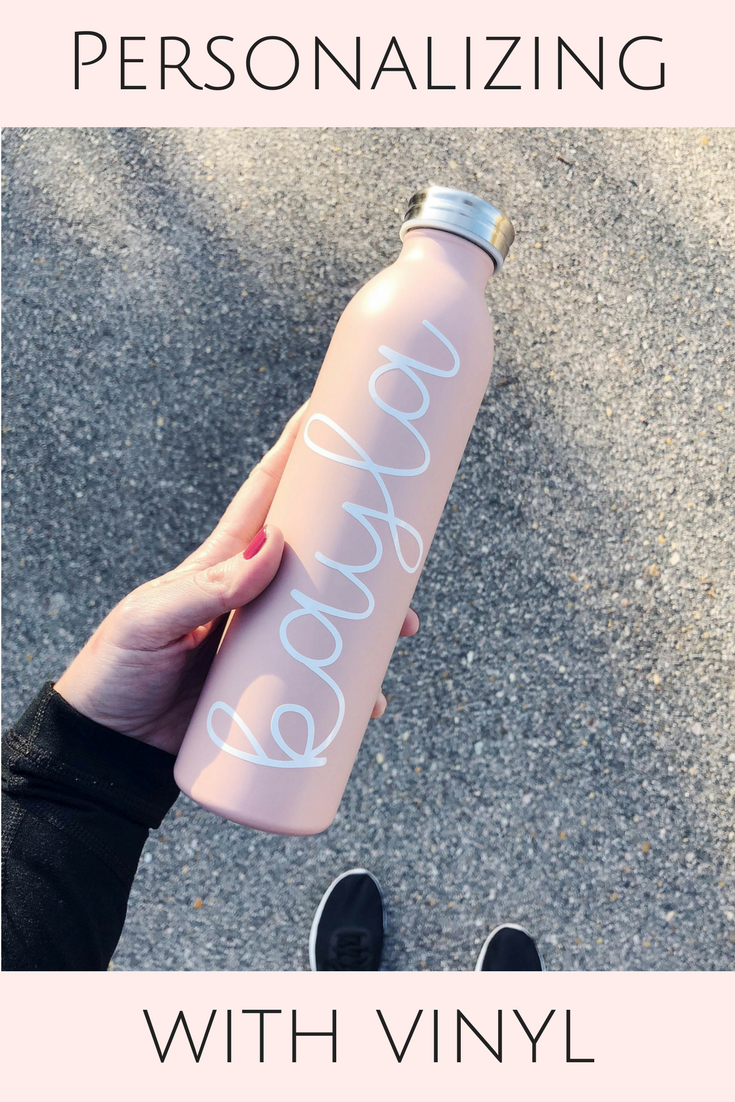
My oldest girl and I have a daily workout routine. Every afternoon we moan and groan through xxx minutes of hardcore booty toning. Gotta get these wintertime bods set up for summer, #amiright? 😉 Now that the weather condition is getting warmer we programme to start adding in walking/running for some extra cardio. Existence the girly girls that we are, nosotros must run in style, so I added our names to some beautiful water bottles using a sheet of agglutinative vinyl. Today, I'm showing you how easy it is to personalize anything!
Gather up the following:
- Blank Water Bottles (mine are from hither but annihilation will piece of work!)
- Cricut Maker or similar machine
- Cutting Mat
- Oracal 651
- Transfer Tape
- Weeding Tool
- Scraper
Step 1: Ready Designs in Cricut Blueprint Space
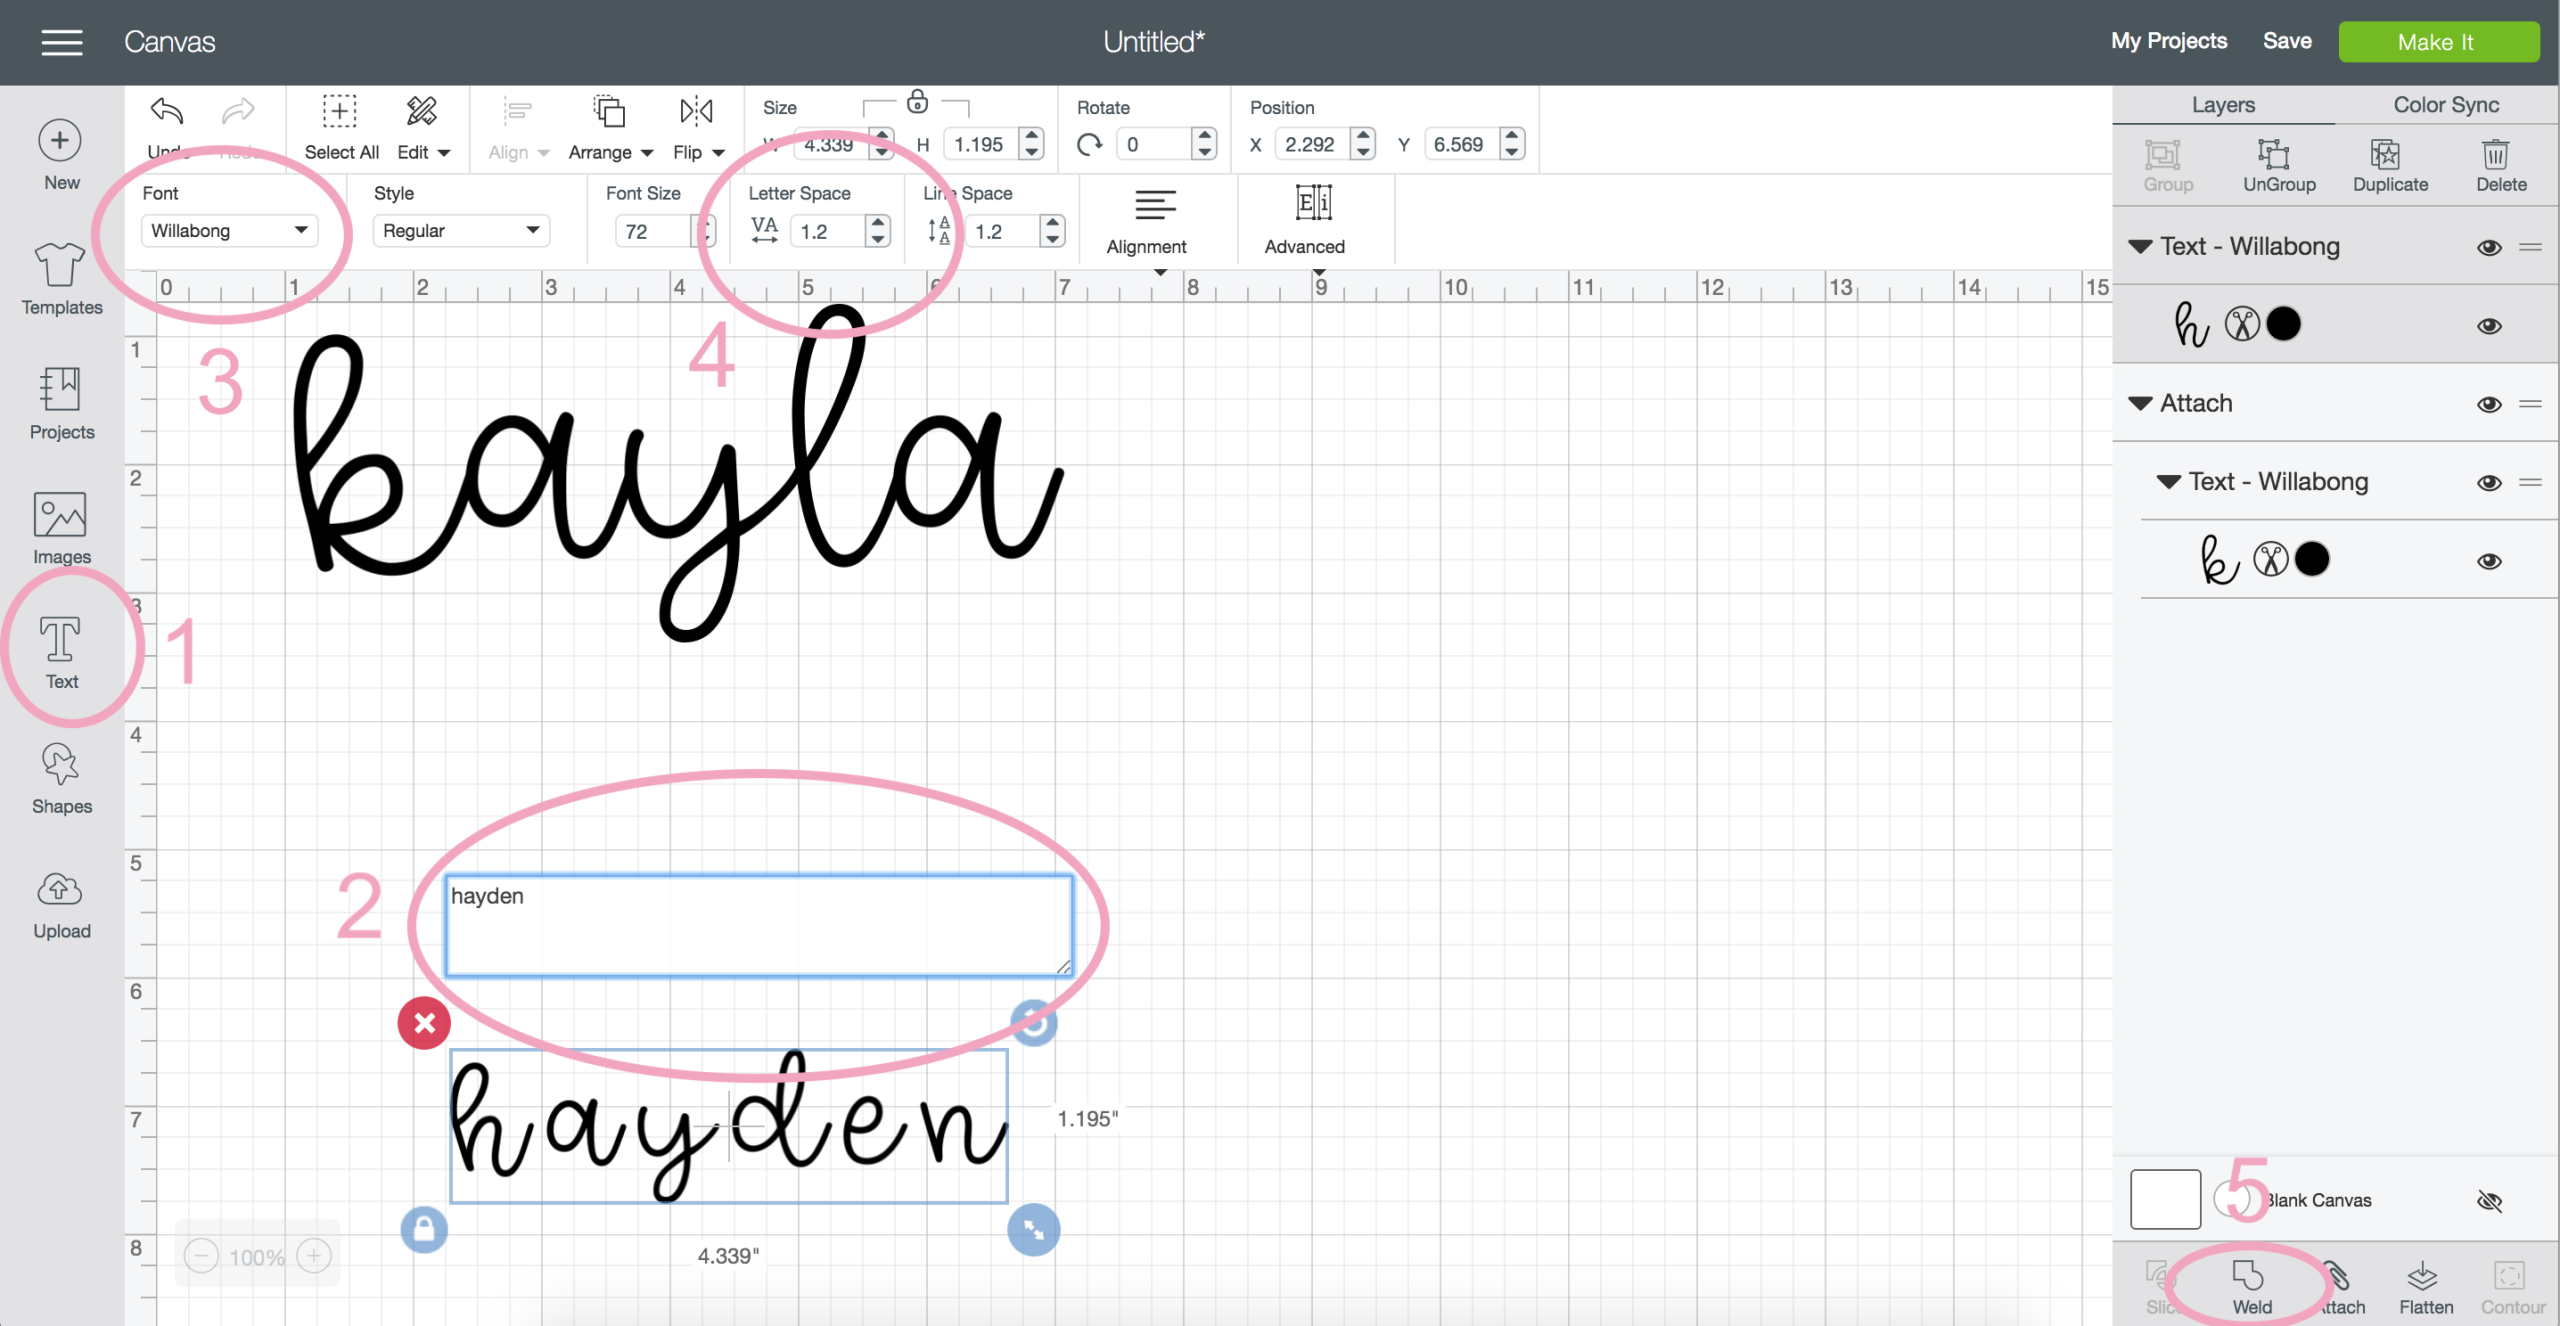
(1) Click the TEXT push button on the left of the Design Space window.
(ii) Type your word in the popup text box.
(3) Select your font in the top left corner. For this project, I'm using the font Willabong.
(iv) Suit the letter spacing. Typically, words await best when the spacing is set to cipher.
(5) Select all and click weld. This keeps the letters from cutting separately and instead cuts the unabridged give-and-take as 1 piece.
You can see in the screenshot above that the word Kayla is correctly spaced, welded and ready to be cutting.
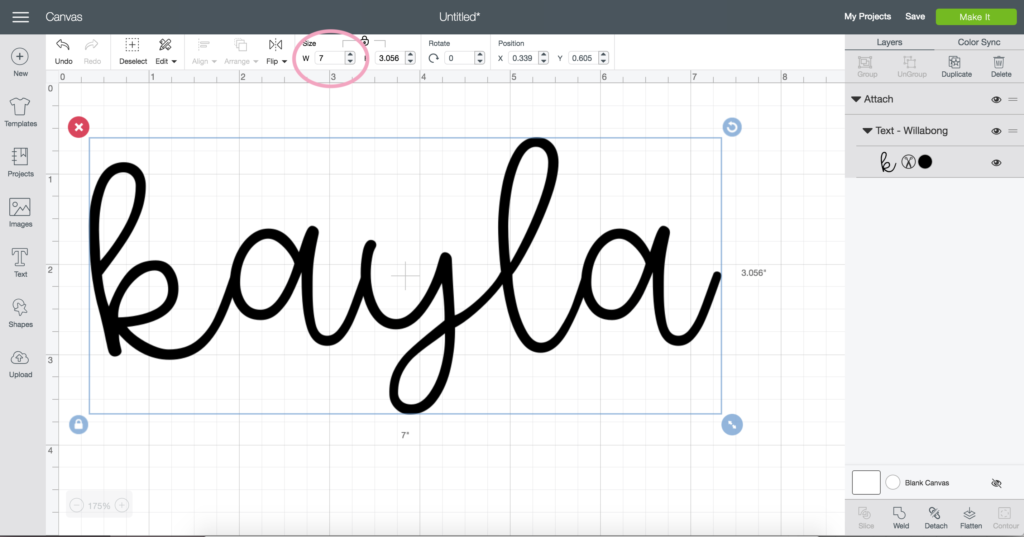
Now, resize the design to fit the h2o bottle. My bottle is nine inches tall so I set the width of my word to 7 inches. This volition permit me to center the word on the bottle with virtually an inch of blank space on either side.
Footstep Two: Load Material and Cut
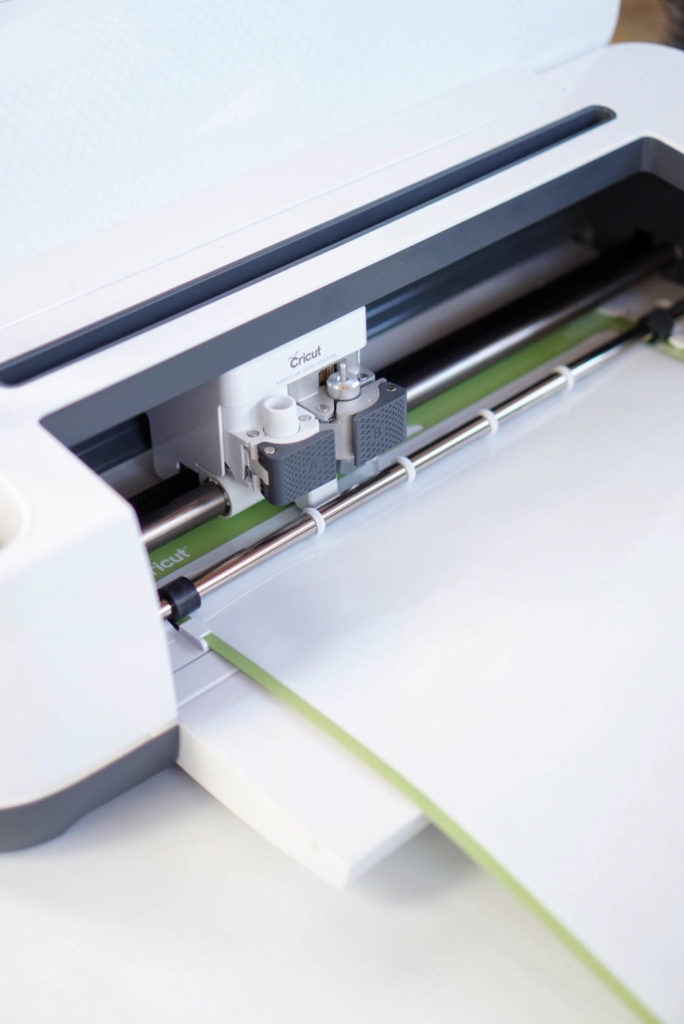
Stick the vinyl to the cutting mat with the sleeky side facing up and load the mat into the machine. The software volition prompt you to press the flashing Become button and then the machine volition begin cutting.
Stride Three: Weeding
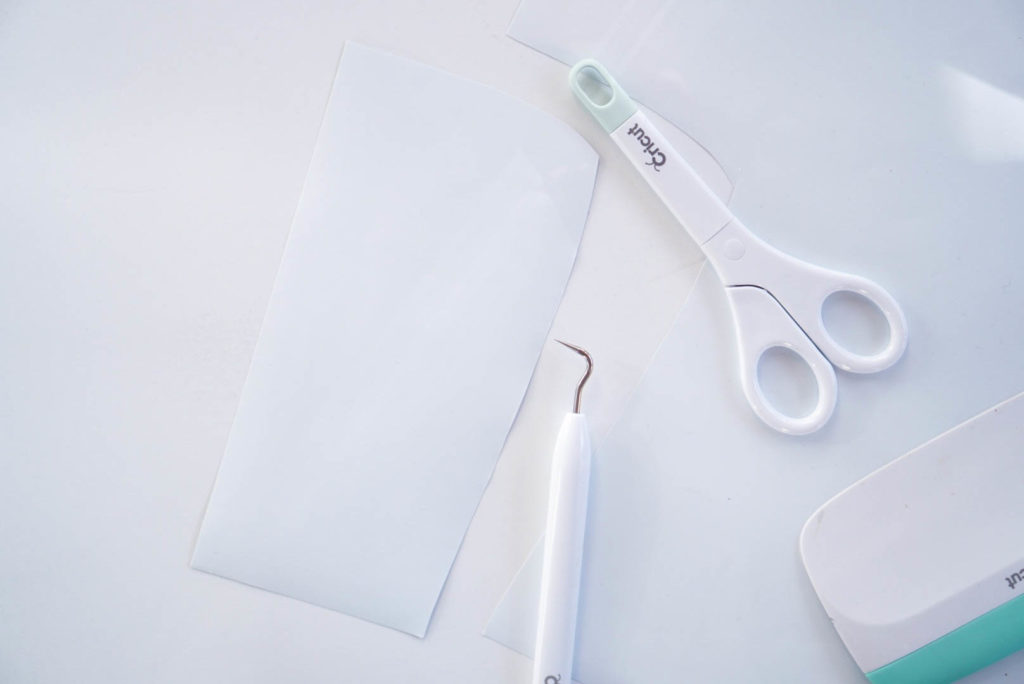
Once the cutting is complete unload the mat and remove the sheet of vinyl. Cutting the design away from the sheet of vinyl using scissors.
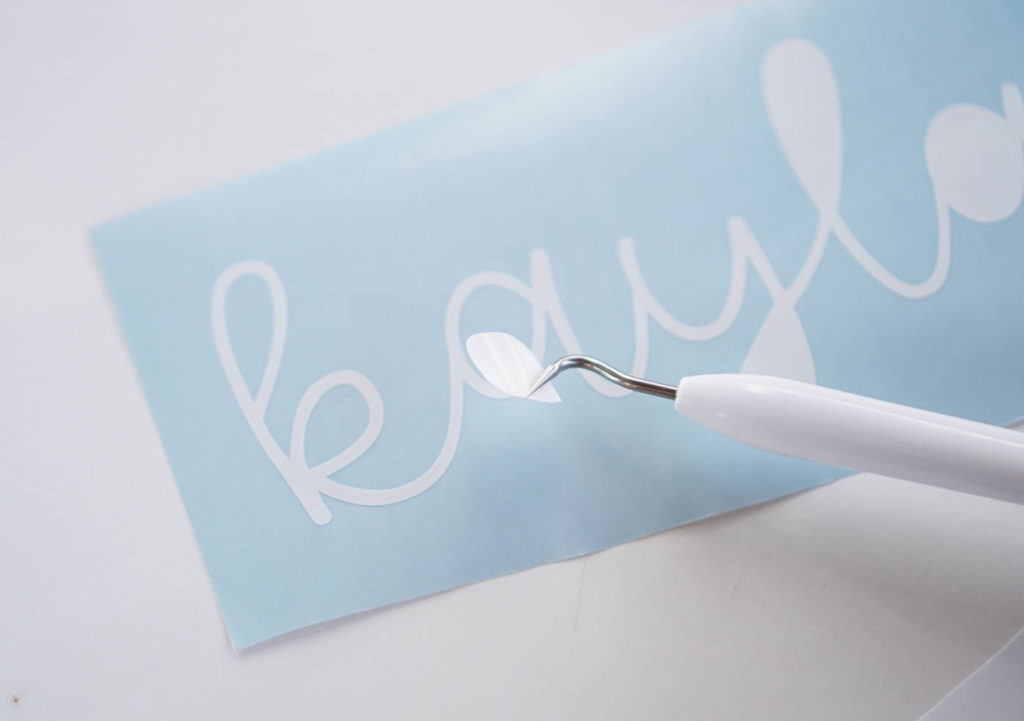
Use a weeding tool or something similar to weed abroad the negative areas.
Stride Four: Apply Transfer Tape
![]()
Cutting a slice of transfer record to fit over the design so use the scraper tool to burnish over the pattern and ensure information technology completely adheres to the transfer tape.
Pace Five: Transfer Design
![]()
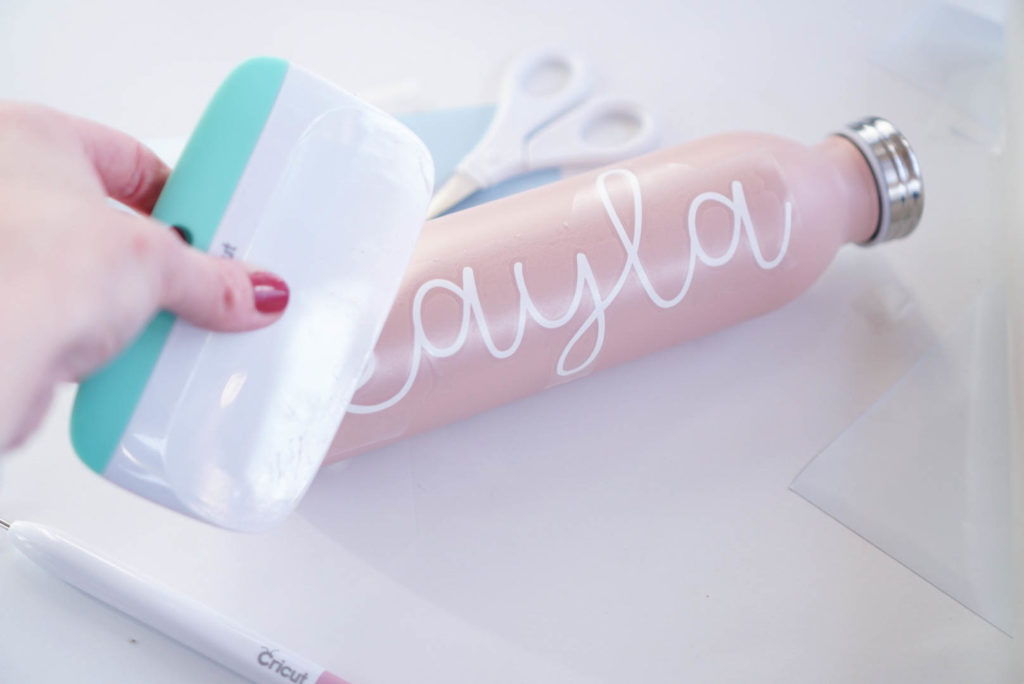
Peel the transfer tape away from the vinyl backing and apply the decal to your water bottle (or annihilation!) using the scraper tool again to burnish actually well over the blueprint.
Step Half dozen: Remove Transfer Tape
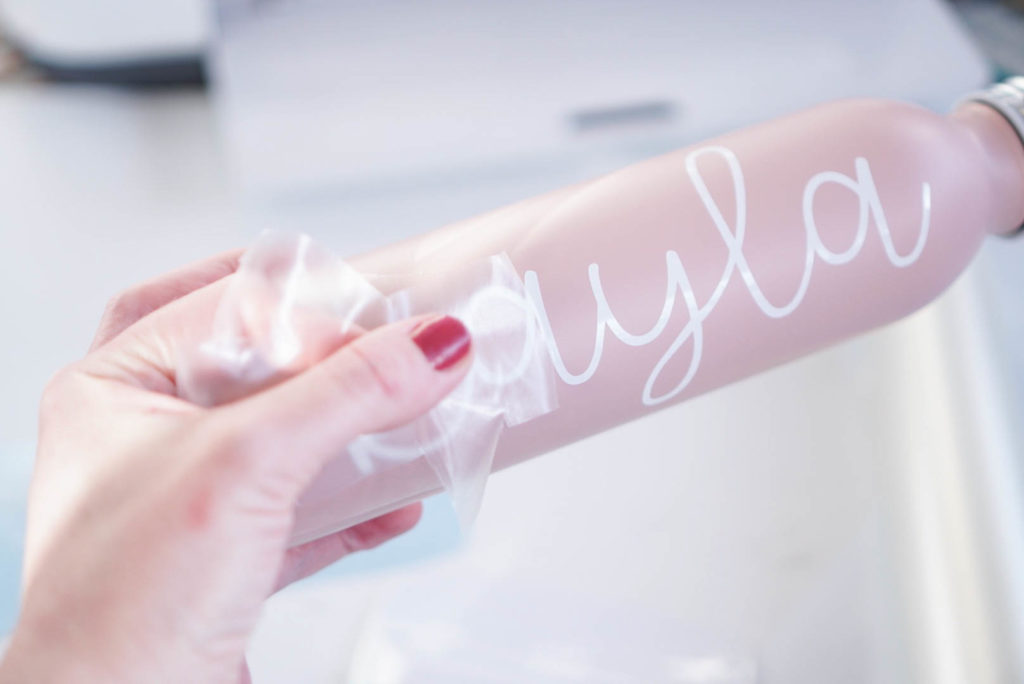
Peel away the transfer tape and enjoy! Remember it'south always best to handwash items with vinyl decals. It prolongs the life of the adhesive!
Thank you lot to Craftey for sponsoring this mail! Craftey is a community website where you lot can become to learn all of the tips and tricks to get you up and running or get inspiration for your next projection. Click here to visit the Craftey website and join in on the crafty fun!


How To Personalize Water Bottles Without Cricut,
Source: https://kaylamakes.com/2018/02/08/personalize-water-bottle-vinyl/
Posted by: muirtragivan.blogspot.com
0 Response to "How To Personalize Water Bottles Without Cricut"
Post a Comment